Generating OpenGraph image cards for my Zola static blog with Cloudflare Functions and Rust
anelson November 16, 2024Not long ago I resumed posting stuff on 𝕏. I noticed that when I posted links to my blog posts, they rendered in a really ugly way that looked sloppy to my eyes. Comparing this to how links to, for example, Github repos were rendered, it was a night and day difference.
One lazy weekend I decided that my blog, a very lonely corner of the Internet with basically no traffic, must have a fancy OG card for every post! Not for any practical reason, just that it’s mine and I like nice things and there was no one around to stop me. The same “because I can” reasoning further moved me to do this in Rust and WASM, although there would have probably been easier ways to go about this.
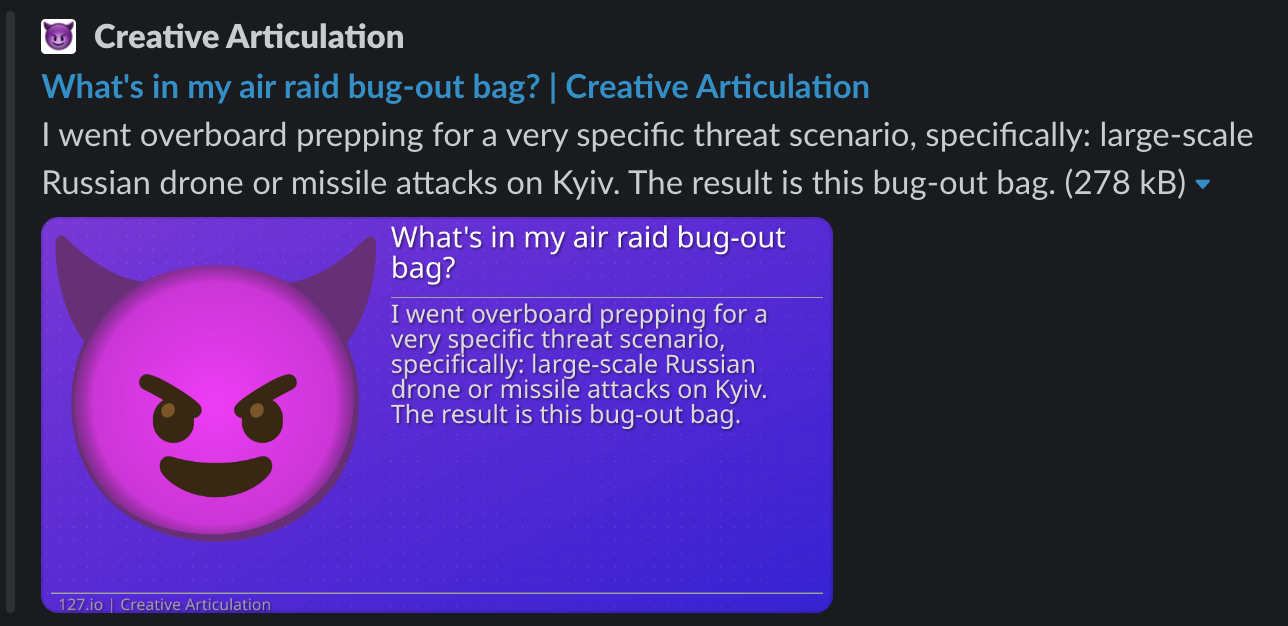
Before this project, this is what the preview looked like when posting a URL to one of my blog posts in Slack:

The Slack preview actually doesn’t look that bad, but on 𝕏 it’s just dreadful. Here is the same URL, but in the 𝕏 post composer:

Compare this with what it looks like when posting a Github repo URL on 𝕏:

You can imagine the jealousy I felt, seeing how cool Github was able to make their repo URLs render in preview, and how plain and ugly my own posts looked by comparison. Or, maybe you’re a normal person and can’t imagine caring about such a small detail, in which case just believe me when I say that this really bugged me and I had no choice but to do something about it.
I quickly learned that Slack,
𝕏, and pretty much anything else that generates preview thumbnails of URLs use the OpenGraph metadata property og:image in a given HTML page, which if present is assumed to contain the URL to the image that should be used as the preview for that page.
𝕏 also has its own meta property, twitter:card and twitter:image, but the idea is the same, and
𝕏 falls back to the OG properties if none of its own are present. So in the head HTML element, one needs only place a few tags like this:
<!-- Custom image to use to preview this page -->
<!-- X-specific preview image (falls back to OG if these are not present) -->
and whatever is at the URL specified in content will be rendered as the preview. Sources seem to vary on what supported image formats are allowed, but PNG definitely works everywhere.
My blog uses the Zola static site generator to generate HTML from my Markdown blog posts, and Cloudflare Pages to host the resulting static assets. One very easy thing I could do would be to create an image that looks nice enough to represent all posts on my site, and modify the Zola HTML template for my blog to point og:image and twitter:image metadata properties to that image. The problem with that is that each post would always have the same image, so the image could not have any post-specific details. That’s lame. GitHub didn’t do that; they automatically generated a preview image for each repo based on some information about that repo. I wanted the same!
Because my blog is statically generated by Zola, and Zola doesn’t have any built-in support for generating post-specific preview images, I decided I’d try using Cloudflare Functions, a serverless function product from Cloudflare that is part of their Cloudflare Pages product that I was already using. Unfortunately, Cloudflare Functions uses Javascript, so I started looking into ways I could generate preview images with Javascript, much as it pained me to do so.
It turned out that many people are as fastidious as I am and wanted their own cool custom OG preview images, so there is a proliferation of Javascript-based solutions. To pick but one, Vercel published a OG Image Generation function that does this. Their docs described a particular feature that caught my eye:
- @vercel/og uses Satori and Resvg to convert HTML and CSS into PNG
I’m not much of a designer, particularly not of the pixel-pushing variety, so the idea of making a template in HTML describing how my preview image should look and getting an image with a raster rendering of that HTML seemed like the right approach. But I didn’t want to use Javascript, I wanted to use Rust! So, rather than solving this problem easily but unsatisfactorily in a few minutes with off-the-shelf Javascript, I started to explore how I might achieve this using Rust, with the caveat that whatever I came up with had to be callable from Cloudflare Functions.
Those of you who stubbornly want to use Rust to do everything probably already know about WASM. As it turns out, last year Cloudflare posted a blog about using Cloudflare Pages Functions with Webassembly. It turned out that Cloudflare Pages Functions are just a special-case of the more general Cloudflare Workers, the latter also supporting WASM. This post showed how to write a Rust function, compile it to WASM, and call it from a Cloudflare Pages Function written in Typescript. Yes!
I set about writing some Rust code that would render HTML to an image. I very quickly ran into a roadblock: there are no such libraries in Rust, as rendering HTML turns out to be hard. I quickly relaxed my requirements and decided that SVG is also fine, which led me to resvg. Recall that Resvg was mentioned in the Vercel docs as well. The difference is that in Javascript-land they make use of Satori which renders HTML/CSS to SVG, and then Resvg renders that SVG to a PNG. I’d already accepted using SVG to describe my OG preview image, so I was fine with just using Resvg directly. It’s a great project, with strong SVG support and is pure Rust which means compiling it to WASM isn’t a challenge.
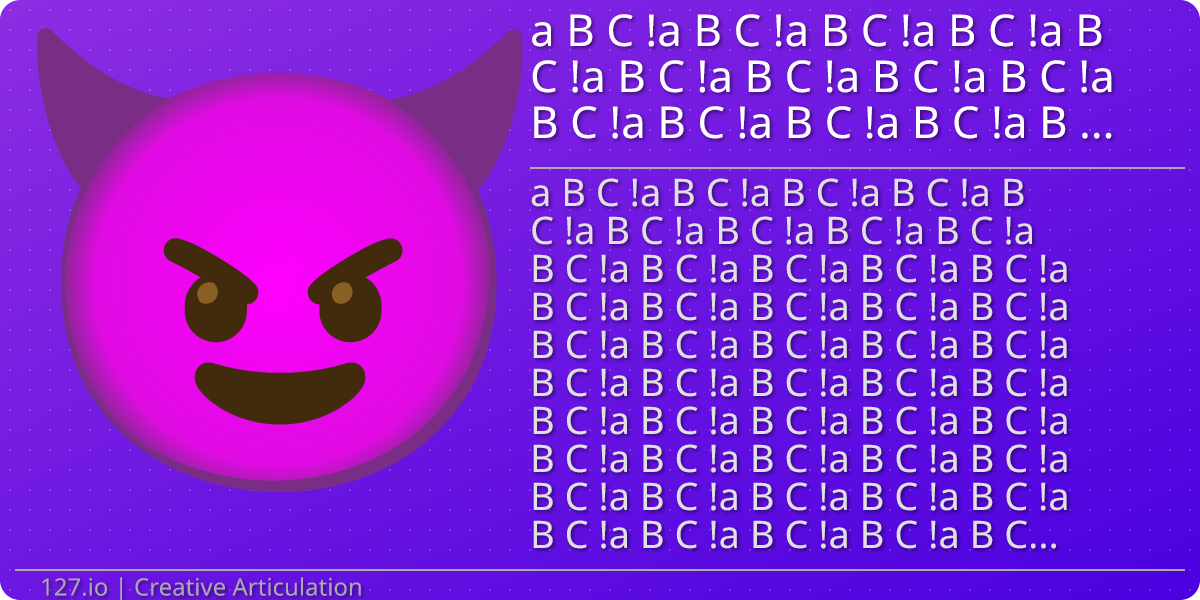
Once I was sure SVG rendering would work, I used Claude Sonnet 3.5 to generate some candidate SVG layouts. Making the most beautiful OG image wasn’t the goal here; the goal was to have something unique to me that could be used as a template for any post on my site. In the end I came up with this:

Making this into a template was a bit more of a challenge. I used the Askama crate to compile the SVG template into the Rust binary and present a typed Rust struct as the interface to generating the output SVG:
The SVG itself is modified to use the Jinja2 template syntax which Askama also supports, which is validated at compile time but evaluated at runtime to produce dynamic SVG based on the inputs specified in the struct above. A few lines from the SVG template illustrate this concept:
You might notice that the inputs are post_title_lines and post_description_lines, instead of just a post title and description. Why? Because Resvg (and maybe SVG in general?) doesn’t implement advanced text rendering, including wrapping text in a bounding box. We take this for granted in HTML but it’s actually rather complex, particularly with arbitrary fonts and glyphs.
I wasn’t about to implement a typesetting mechanism in SVG just for this vanity project, so I came up with an ugly hack that mostly works: through trial and error, I figured out how many A characters fit on one line in my particular template before they go too far to the right and overflow the image boundary. I then made a const for that number, and used the textwrap crate to perform the much simpler task of breaking up text at word boundaries such that no line has more than the max number of characters:
This is, I want to emphasize, fucking hideous! The algorithm assumes all letters have the same width, but I am using a variable-width font (about which more later), so it will wrap on some boundaries too early and make for oddly short lines. It’s not the algorithm that your browser or your word processor uses when typesetting text. But it’s also just a few lines of Rust, and unless you’re looking closely at the generated OG image cards, you probably won’t notice that the word wrapping is a bit funky.
All of this worked great when compiled for the Apple Mac Rust target and run in a test locally. Then I tried to run it under WASM, and immediately stumbled:
You see, I haven’t shared the full SVG template. It refers to two external resources, one directly and one somewhat indirectly:
Can you spot them both? The obvious one is the reference to devil.svg, an SVG version of the iOS smiling devil emoji that has been my logo since before emojis existed (search “Simon Jester” if you’re curious). The indirect one is the font reference, Noto Sans. On my Mac the devil.svg file is in the Git repo alongside the template, and I had installed the free Noto Sans font long ago. But when code runs in WASM, it runs in a sandbox isolated from both the filesystem and the system fonts; in fact when Resvg is compiled for WASM it doesn’t even have a system font API to link to. I started to despair, and wondered if maybe I should just generate a static OG image for the entire site and be done with it. No one will ever notice.
But, no! I will notice. I resolved to dig into the Resvg code and find a solution. And find I did!
First, I modified the Rust code to compile into the Rust binary both the devil.svg file and the Noto Sans font file:
Then I took advantage of the very well designed Options API in the usvg crate, which is the component that Resvg uses to parse SVG and prepare it for rendering. This API design appeared to anticipate my needs exactly, and provided a way to intercept and handle what would otherwise be outgoing network requests to retrieve external resources (devil.svg in this case), and another function to populate the fonts DB with custom font data in a Vec<u8>:
With this, I had WASM code running that could generate an SVG from my template for a given site title, post title, and post description, apply word-wrapping, and render that SVG to a PNG, with the text rendered in a custom embedded font!
But immediately I saw something I disliked: the resulting PNG was 600KiB! For a 1200x600 OG title card that was mostly just text and some simple vector graphics!
I started to dig into this, and learned that users of PNGs who really care about file size optimize the PNGs to make them a bit smaller, at the expense of some up-front compute cost to do the optimization. As it happened, one of the most popular tools was called oxipng, and if you thought maybe the “oxi” prefix indicates a Rust tool, then you thought right! The oxipng crate is also shipped at a CLI binary, but in my case I wanted to compile the functionality directly into the WASM binary. Again fortune smiled, as oxipng is pure Rust and also easily compiles for WASM.
The code to get oxipng in the loop to post-process the PNG that Resvg generated from the SVG was a bit complex, owing to the way Resvg works.
Once you have your SVG parsed in memory in a usvg::Tree struct, you allocate a “pixmap” (basically a buffer meant to hold pixels) using the tiny-skia crate, and you call resvg::render passing in the SVG tree struct and the pixmap that you want Resvg to render into:
The result isn’t a PNG file; it’s a pixmap containing the raw pixel values for the rasterized SVG. tiny-skia has an optional feature that will produce a PNG directly from that pixmap, which is what I used originally that produced a very unoptimized PNG. I wanted oxipng to do the PNG creation so that it could optimize the output, so I disabled the feature in tiny-skia that implements direct PNG support, and wrote a Rust function pixmap_to_optimized_png that takes a tiny-skia pixmap and creates an optimized PNG.
pixmap_to_optimized_png is a bit long, I don’t want to embed the whole thing here. You can go to the repo and see the whole thing here. There is some trickery required to convert the pixmap into just raw pixel values in a Vec<u8>, after which it’s pretty straightforward:
This worked, although not as well as I hoped. PNGs were now around 400KiB, and the generation step took almost 2 seconds when run on Cloudflare! The free tier on Cloudflare allows a miserly 10ms of CPU usage per function call, so I had to switch to the $5/mo “paid” plan to up that to 15 minutes. Given the disappointing performance, it was clear that caching would be required. Cloudflare Pages has a serverless product called “KV” which, as the name implies, is a key-value store that is well-suited for use as a cache. On the $5/mo paid plan that I had to upgrade to anyway, KV monthly limits are crazy: 10M reads, 1M writes, 1GB of data. So I can use KV “for free” for caching. However there was no chance that I could integrate with KV directly from Rust, as the WASM code doesn’t have any network access. So, reluctantly, I started to adapt the Typescript wrapper around my Rust WASM masterpiece to implement caching.
You can read the entire Typescript file here if you’re interested. I certainly am not. But I do want to point out a couple of interesting bits:
The way I wanted this to work is by referring to the og-image Cloudflare function in the meta tags that point to the OG image card in the header. For example something like this:
Note that the only information passed on the query string to og-image is just the path to the post. But recall that the template takes parameters site_name, post_title_lines, and post_description_lines. Where do those come from?
Well, a naive way would have been to pass them as a query string parameter directly, like:
But the problem with that is that I have asshole friends who would abuse this to generate OG title cards with my blog’s branding for posts I never wrote, like “10 ways Golang is better than Rust (#7 will shock you!)” or “Star Wars Episode 1 is the best Star Wars! Fight me!”. Or they might learn that it takes 2 seconds of Cloudflare Pages compute time to generate an image, and spam my site with requests for unique title/description combinations to drive up my Cloudflare bill. Or some unscrupulous copy-cat might decide that my blog’s livery is simply dazzling and use the og-image generator to generate OG title cards for their own site without my permission! Now admittedly, this last one opens the unscrupulous copy-cat up to some very amusing trolling opportunities if I were to discover what they had done, but I don’t have time for any of that nonsense. So I want to be able to limit og-image to generating only title cards for posts that actually exist on my site.
So, I decided to compile in to the Cloudflare Functions bundle the list of all posts, their titles and descriptions. I made a custom Zola template called og-metadata.html, which does that. The Zola template is in my blog’s content repo which is private, but here’s a snippet for those who are interested:
{
"default": { "title": , "description": },
: {
"title": ,
"description":
}
,
}
It produces JSON output that looks something like this:
Why is it called og-metadata.html if it’s a JSON output? Well, that brings us to the first hideous workaround to barely-documented Cloudflare limitations, to wit:
The comment explains the weird name. This embeds the contents of the generated public/og-metadata.html file which Zola creates at build time by applying the og-metadata.html template, and makes it available in the function Typescript as a string variable. I made a Typescript type to represent the shape of this JSON:
and at function load time I parse the JSON into this struct:
There are not even 3 dozen posts as of this writing, so the overhead of this is minimal.
I then use the path passed in on the query string as p to look up the metadata in this JSON:
A couple things to note:
- If the
pvariable contains a path that doesn’t correspond to a known post, the code silently falls back todefaultwhich is just the OG card for the main 127.io site. Asshole friends trying to mess w/ this will not get far, as thatdefaultwill be served from the cache very quickly and will not contain anything amusing or incriminating. - I use a cheap hashing function
fnv1a(I just noticed the comment says “SHA-256” but it’s not) to hash the post title and metadata and include this in the cache key. This ensures that if I change existing post metadata for some reason, the old cached OG card will not be served any more.
There’s code that queries the KV namespace for the cache key, generates the image if not found, etc but that’s all very straightforward. Look in the repo if you want to read the whole thing.
The one final thing I want to point out, relating to using Rust code in Cloudflare functions via WASM: I linked earlier to a Cloudflare blog post about using Rust via WASM in Cloudflare Functions. In that post, this is the code proffered to load a WASM module for use in Typescript:
// functions/api/distance-between.js
;
This code wasted hours of my time, because it works in this particular blog post example but is wrong!
That distance_between function is written in Rust and compiled to WASM. Here’s the Rust declaration:
Note that all arguments and the return value are scalars, f64 in this case. Because of this, calling the WASM export distance_between directly works fine.
But here is my generate_og_image function as declared in Rust:
Notice JsString and Vec<u8>. These are not scalar types. They cannot be used directly from Javascript!
That’s why when you run wasm-pack as part of the build process to compile your Rust code and generate a WASM module, it doesn’t just generate the WASM file:
ll pkg --no-icons
.rw-r--r--@ 427 rupert 16 Nov 18:23 og_generator.d.ts
.rw-r--r--@ 162 rupert 16 Nov 18:23 og_generator.js
.rw-r--r--@ 5.4k rupert 16 Nov 18:23 og_generator_bg.js
.rw-r--r--@ 4.2M rupert 16 Nov 18:23 og_generator_bg.wasm
.rw-r--r--@ 468 rupert 16 Nov 18:23 og_generator_bg.wasm.d.ts
.rw-r--r--@ 397 rupert 16 Nov 18:23 package.json
.rw-r--r--@ 758 rupert 16 Nov 18:17 README.md
See those .js and .d.ts files? Those are important! They wrap the WASM in Typescript/Javascript wrappers, that transform input arguments from Javascript into the WASM types that Rust expects, and output values from Rust’s WASM representation to Javascript. Very important!
That is why in my Typescript function you see the WASM being imported differently:
Maybe in a follow-up post I’ll go into more detail on what’s going on here. For now let’s just say that this is the way wasm-pack intends for you to consume the generated WASM module in this case.
But wait! The above still won’t work right. Because the generated wrappers have to be initialized explicitly, due to some pecularity of how Cloudflare Workers is unlike the other Javascript environments that wasm-pack is generating for:
Now, at last, this will work! You can use wrangler to deploy this to Cloudflare.
After all of this, I can finally hold my head high when posting links to my blog posts on social media. Feast your eyes on the fully operational 127.io OG images:
Dazzling, I’m sure you’ll agree!
As mentioned, it takes ~2 seconds to generate a single OG image.
𝕏 seems to timeout very aggressively when requesting OG card images, and even if it didn’t 2 seconds is a long time to wait for visual feedback when pasting a URL in somewhere that uses these images as a URL preview. So at the end of this project I put a step in the Github Actions workflow that runs when I publish new blog content, to use that same JSON file og-metadata.html to get a list of post URLs and use curl to request the OG card for each one, which pre-heats the cache. It is not lost on me that I could just as easily have implemented static generation of the OG image assets in a simple Rust program running under GHA, solving this problem in a much more straightforward and performant way, without having to pay an extra $5/mo to Cloudflare or jump through numerous hoops with underdocumented Cloudflare features and the challenges of running Rust under WASM. But I’ve learned a lot about WASM, SVG, PNG, Cloudflare Functions, and the risks of indulging one’s obsessive tendencies. Maybe, in the end, the real OG image card is the friends we made along the way!

